FileFy



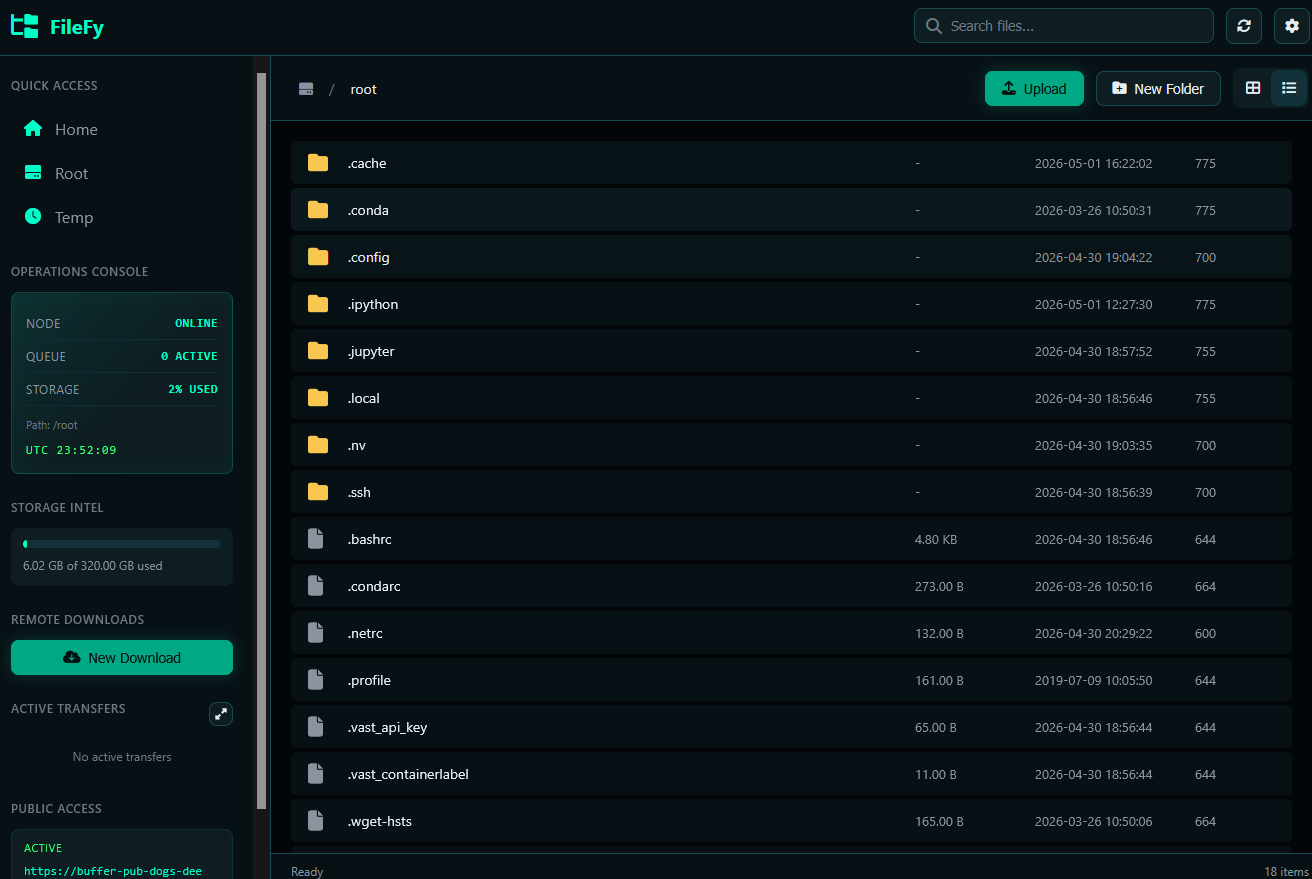
A professional Modern web-based File Manager Features Remote Upload/Download, Remote URL Downloads With Progress Tracking , and Peer-To-Peer Sync Transfer Data.


Features
- Peer-To-Peer Data Transfer (Upload & Download)
- File Upload - Drag & drop or click to upload files. Uploads are chunked, with per-file progress, pause / resume / cancel controls, and they survive transient connection drops.
- File Download - Download files directly from the browser, with HTTP Range support so the in-browser transfer manager can pause and resume large local downloads.
- Remote Download - Download files from URLs with progress tracking and pause / resume / cancel support. Screenshot
- Compress - Right-click any file or folder and create an archive
(
.zip,.tar,.tar.gz) directly on the server. - Transfer Center - Centered, project-themed panel that shows every in-flight transfer (upload, download, remote download). It can be minimised to the sidebar and never gets stuck on a Cancelled / Error state — every row has Pause, Resume, Cancel and Dismiss controls.
- Cloudflare Tunnel - Optional
--tunnelflag that publishes the server through a free*.trycloudflare.comURL alongside the local one. Requires thecloudflaredbinary to be installed on PATH. - File Operations - Copy, move, rename, delete files and folders
- Search - Quick file search functionality
- Context Menu - Right-click menu with common actions
- Keyboard Shortcuts - Ctrl+C, Ctrl+V, F2, Del, F5
- File Preview - Preview text files and images
- Disk Usage - View disk space information
Quick Start
Install from PyPI (One Command!)
pip install filefy
Run the File Manager
# Start with default settings (port 5000, home directory)
filefy

# Custom port
filefy --port 8080

# Custom directory
filefy --dir /path/to/directory

# Bind to specific host
filefy --host 127.0.0.1 --port 3000

# Enable debug mode
filefy --debug

# Also expose the server on a public Cloudflare tunnel
# (install cloudflared first: https://github.com/cloudflare/cloudflared)
filefy --tunnel
Then open your browser and go to: http://localhost:5000
Installation Methods
Method 1: pip (Recommended)
pip install filefy
Method 2: From Source
git clone https://github.com/Pymmdrza/filefy.git
cd filefy
pip install -e .
Method 3: Using pipx (Isolated Environment)
pipx install filefy
Method 4: Docker (GitHub Container Registry)
Pre-built multi-arch (linux/amd64, linux/arm64) images are published on every
push to the default branch and on every v* tag at
ghcr.io/pymmdrza/filefy.
# Pull and run the latest image, mounting the host directory you want to manage
docker run -d \
  --name filefy \
  -p 5000:5000 \
  -v "$PWD/data:/data" \
  ghcr.io/pymmdrza/filefy:latest
Open http://localhost:5000 to use the file manager. The container exposes the following environment variables (all optional):
| Variable | Default | Description |
|---|---|---|
FILEFY_HOST |
0.0.0.0 |
Interface to bind the server to |
FILEFY_PORT |
5000 |
Port to listen on (inside the container) |
FILEFY_DIR |
/data |
Base directory exposed by the manager |
Pin a specific version by tag, e.g. ghcr.io/pymmdrza/filefy:v1.0.0.
Docker Compose
A ready-to-use docker-compose.yml is included:
docker compose up -d
This will mount ./data into the container and expose the UI on
http://localhost:5000. Replace the image: line with build: . to build the
image locally from the source tree instead of pulling from GHCR.
Build the image yourself
git clone https://github.com/Pymmdrza/filefy.git
cd filefy
docker build -t filefy:local .
docker run --rm -p 5000:5000 -v "$PWD/data:/data" filefy:local
CLI Usage
usage: filefy [-h] [-H HOST] [-p PORT] [-d DIR] [--debug] [--tunnel] [-v]

filefy - Professional Web-Based File Manager

options:
  -h, --help            show this help message and exit
  -H, --host HOST       Host to bind the server to (default: 0.0.0.0)
  -p, --port PORT       Port to run the server on (default: 5000)
  -d, --dir DIR         Base directory for file management (default: home)
  --debug               Enable Flask debug mode
  --tunnel              Also publish the server through a Cloudflare quick
                        tunnel and print the public URL alongside the local
                        URL. Requires the 'cloudflared' binary on PATH.
  -v, --version         show program's version number and exit

Examples:
  filefy                         Start with default settings
  filefy -p 8080                 Use port 8080
  filefy --host 127.0.0.1        Only allow local connections
  filefy -d /home/user/files     Set base directory
  filefy --debug                 Enable Flask debug mode
  filefy --tunnel                Also expose a public Cloudflare URL
Python API
You can also use filefy programmatically:
from filefy import app, create_app
from filefy.server import run

# Option 1: Run with default settings
run()

# Option 2: Run with custom settings
run(host='127.0.0.1', port=8080, base_dir='/home/user/files')

# Option 3: Get Flask app for custom deployment
app = create_app(base_dir='/var/www/files')
# Use with gunicorn, waitress, etc.
Using with Gunicorn
pip install gunicorn
gunicorn "filefy:create_app()" -b 0.0.0.0:8000 -w 4
Using with Waitress (Windows)
pip install waitress
waitress-serve --listen=0.0.0.0:8000 filefy:app
Development
Setup Development Environment
git clone https://github.com/Pymmdrza/filefy.git
cd filefy
python -m venv .venv
source .venv/bin/activate  # On Windows: .venv\Scripts\activate
pip install -e ".[dev]"
[!NOTE] More details about API
License
This project is licensed under the MIT License - see the LICENSE file for details.
Contributing
Contributions are welcome! Please feel free to submit a Pull Request.
- Fork the repository
- Create your feature branch (
git checkout -b feature/AmazingFeature) - Commit your changes (
git commit -m 'Add some AmazingFeature') - Push to the branch (
git push origin feature/AmazingFeature) - Open a Pull Request
Made by MMdrza